How to Resize and Compress a Passport Photo Online
A passport photo upload can fail even when the picture looks perfectly fine. The file may be too large, too small, the wrong shape, saved in the wrong format, or cropped with your head positioned incorrectly.
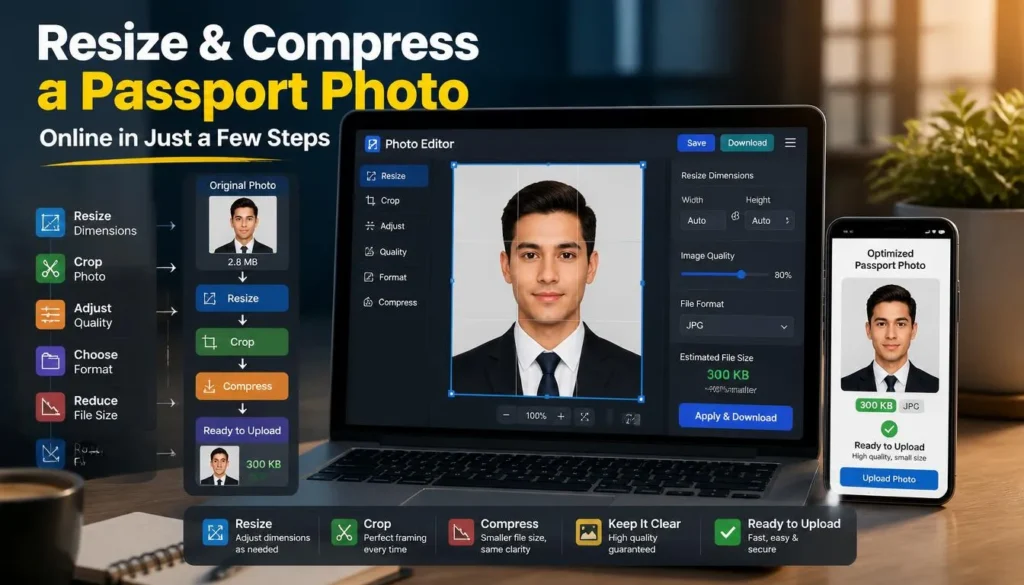
To compress image for passport photo uploads safely, do not start by lowering image quality. First match the photo’s required shape and pixel dimensions. Then export it in the accepted format usually JPG or JPEG and reduce the file size only enough to meet the portal’s limits.
That order keeps the image clear and makes rejection less likely.
Passport Photo Rules Are Not Universal
There is no one “passport photo size” that works for every country or application type.
Some online systems require a square image. Others need a vertical portrait image. File limits can range from a few dozen kilobytes to several megabytes, and accepted formats may be limited to JPEG. A photo that works for one visa portal may fail on a passport renewal application for the same country.
For example, a U.S. style digital passport or visa photo commonly uses a square image between 600 × 600px and 1,200 × 1,200px. A UK style online passport photo is normally portrait oriented. Canadian online passport applications use a larger portrait image with a 3:2 aspect ratio. Other application systems may require fixed dimensions such as 630 × 810px.
Treat the upload page as the authority. Before editing anything, note the exact specifications listed there.
What to Check Before You Resize
Save the official requirements in a note or screenshot. You will need more than the maximum file size.
Check for:
-
Required file format, usually JPG or JPEG
-
Minimum and maximum file size
-
Required width and height in pixels
-
Required orientation: square or portrait
-
Required aspect ratio, such as 1:1, 3:4, or 3:2
-
Background color requirements
-
Whether the image must be in full color
-
Photo age requirement
-
Rules for glasses, head coverings, shadows, facial expression, and head position
-
Whether the system requires a minimum image resolution
These details are connected. For instance, if a portal requests a 600 × 600px square JPG under 240KB, making the image 400 × 400px just to reduce the file size is not a valid solution. You must keep the required dimensions and optimize the file around them.
How to Compress Image for Passport Photo Uploads
1. Start with a clear original photo
Use the original camera image or the original digital file from a photographer.
Do not start from a photo that has been repeatedly saved, sent through a messaging app, downloaded from social media, or captured as a screenshot. Those copies may already have visible compression damage. Once you resize and compress them again, hair, facial edges, and smooth backgrounds can look blocky.
Make a dedicated working copy for the application. Keep the original unchanged in case you need to create a different version for another country or form.
A simple filename system helps:
-
passport-photo-original.jpg -
passport-photo-600x600-220kb.jpg -
passport-photo-630x810-180kb.jpg -
passport-photo-uk-portrait.jpg
2. Check the photo itself before editing
Compression cannot fix an unsuitable photo.
Before you resize anything, confirm that the image has a plain, even background if required, good lighting, a sharp face, and no strong shadow across the eyes or jawline. The face should be centered and clearly visible. Avoid beauty filters, portrait mode blurring, dramatic color edits, mirror selfies, or wide angle distortion.
A clean original is much easier to optimize. It also reduces the risk of a portal accepting the file technically but rejecting the application later because the photo does not meet biometric or visual rules.
For most passport style photos, a simple, direct image works best:
-
Face the camera directly unless the official rules say otherwise
-
Keep your expression neutral where required
-
Use even lighting without hard shadows
-
Avoid cluttered backgrounds
-
Do not crop off hair, ears, shoulders, or the top of the head if the rules require them
-
Remove filters and unusual color effects
3. Crop to the required shape
Crop before compressing.
A large rectangular phone photo may need to become a square image for one application or a vertical portrait image for another. Use the correct aspect ratio from the official instructions rather than guessing.
If the portal needs a square photo, crop to a 1:1 shape. For a 3:4 portrait requirement, retain a vertical 3:4 crop. For a 3:2 passport image, use a vertical 2:3 framing.
The crop is not just about the canvas shape. It controls the position and scale of your face.
Leave the required space around your head. Tightening the crop just to lower file size can cause an otherwise good image to fail. I have seen this happen with photos that were technically under the upload limit but had the top of the hair too close to the edge.
If you are making a separate copy for a general web profile, you can convert your images directly in the browser after creating the right crop. For the passport version, always follow the portal’s exact format and dimension rules.
4. Resize to the specified pixel dimensions
Now resize the cropped image.
When the portal gives an exact pixel size, use that size. If it provides a range, select a sensible size inside the range rather than exporting the largest image your phone can create.
Here are examples of patterns you may see:
The numbers in the table are examples, not a substitute for the rules on your application page. Do not assume a 600 × 600px file is correct simply because another portal accepted it.
Keep the aspect ratio locked during resizing. If you change the width and height independently, the face can become stretched or squashed.
5. Export as JPG or JPEG
JPG is the safest choice for passport and visa uploads.
It is widely accepted, handles full color portraits efficiently, and is easy to reduce to a strict file size limit. PNG is typically too large for a photographic portrait, while WebP although excellent for modern websites is not accepted by many official upload portals.
Follow this rule unless the portal says otherwise:
-
Use JPG/JPEG for passport, visa, immigration, and government photo uploads
-
Use PNG only when the portal explicitly allows or requires it
-
Use WebP for website images only when the destination supports it
Do not rename a .webp or .png file to .jpg. Renaming the extension does not change the file’s actual encoding. Export or convert the image properly as JPG.
If you need a proper browser based JPG export from an image that began as PNG, HEIC, or WebP, our free image conversion tool can create a compatible file copy.
6. Compress gently and keep a buffer
Once the crop, dimensions, and JPG format are correct, check the file size.
If the file is over the portal’s maximum, reduce quality gradually. Start around JPG quality 80–85 for a clear portrait. If you need a smaller file, try 80, then 75, checking the photo after each export.
Do not jump straight to low quality. Passport photos contain large areas where compression flaws show easily: a plain wall, the outline of your head, skin tones, hair, and clothing edges.
Target a file comfortably inside the accepted range:
A buffer helps prevent failure from strict file validators or size rounding. For a maximum of 240KB, a 215KB file is safer than one that lands at 239.9KB.
7. Inspect the finished image before uploading
Open the final JPG and check it at normal size, then zoom in briefly.
Look at the eyes, hairline, ears, face outline, and the transition between your shoulders and the background. The image should remain sharp and natural. Watch for blocky artifacts, blotchy skin tones, rough haloing around the face, or a blurred background that makes the image look edited.
Then confirm the technical details:
-
File extension is
.jpgor.jpegif required -
File size falls within the allowed range
-
Width and height match the stated requirements
-
The image is not rotated sideways
-
The image is full color if required
-
The crop leaves correct headroom and shoulder space
-
The final file is not a screenshot of the original photo
If the upload portal provides a checker or preview, use it before completing the application.
Common Mistakes That Cause Passport Photo Rejection
Compressing before cropping and resizing
This usually produces a poor result.
When you compress a huge original image first, the file loses detail across pixels that you will later throw away. Crop and resize first, then apply only enough compression to meet the size limit.
Using the wrong dimensions to save file size
An image may be under the file size cap but still be invalid because it is too small or uses the wrong aspect ratio.
For instance, if a portal requires a 600 × 600px square photo, a 350 × 350px JPG cannot replace it. Keep the correct dimensions and use JPG compression instead.
Reusing one photo file across different applications
The same photo can be acceptable visually but technically wrong for another portal.
A square 600 × 600px photo may work for one visa form. A different passport application may require a tall 3:2 image at much higher resolution. Create a separate export for each application.
Over compressing a face photo
Faces reveal artifacts quickly.
At very low quality, skin can look painted, hair can break into blocks, and glasses may develop rough edges. If your file remains too large, inspect the dimensions and crop before lowering JPG quality too far.
Uploading WebP when the portal wants JPG
WebP is useful for web performance, but official application systems commonly specify JPEG. Follow the required format even if WebP creates a smaller file.
Ignoring the minimum file size rule
Some portals set a minimum as well as a maximum. A tiny 18KB image may be rejected even if it looks clear. Keep the file inside both boundaries.
Quick Example: Preparing a 240KB Square Passport Upload
Imagine a visa portal asks for a square JPG between 600 × 600px and 1,200 × 1,200px, with a maximum file size of 240KB.
-
Choose a sharp, recent original photo with a compliant plain background.
-
Crop it to a square while preserving the required head position.
-
Resize it to 600 × 600px.
-
Export it as JPG at quality 85.
-
Check the file size.
-
If it exceeds 240KB, lower quality to 80 and export again.
-
If necessary, try quality 75 while keeping the required 600 × 600px dimensions.
-
Select a version around 190–220KB that still looks clean.
-
Confirm the crop, format, pixel size, and orientation one final time.
This approach is safer than trying to force a 4,000px phone image under 240KB without resizing it first.
Read Also: Reduce Image Size for Job Applications and Visas
FAQ
What format should I use for an online passport photo?
Use JPG or JPEG unless the passport or visa portal explicitly accepts another format. JPG is widely supported and works well for full color portrait photos. Do not assume WebP is accepted simply because it makes a smaller file.
How do I make a passport photo file smaller without making it blurry?
Crop the image to the correct shape, resize it to the required pixel dimensions, and only then reduce JPG quality in small steps. Starting with a clear original photo and keeping the required dimensions will produce a better result than aggressive compression.
Can I use a phone photo for a passport application?
Often, yes, provided that it meets the authority’s current photo rules for lighting, background, expression, face position, format, size, and dimensions. A phone photo should be sharp, unfiltered, correctly framed, and exported as the accepted file type.
Why is my passport photo upload being rejected?
The most common technical reasons are an unsupported file format, wrong dimensions, incorrect aspect ratio, file size outside the accepted range, or a rotated image. It may also fail visual requirements, such as an unsuitable background, poor lighting, an outdated image, or incorrect head position.
Does changing DPI make a passport photo file smaller?
Usually, no. Online applications mainly validate pixel dimensions, file format, crop, and file size. Changing DPI alone rarely reduces the actual file size enough to solve an upload issue.
Prepare Your Passport Photo File
To compress image for passport photo uploads without risking a blurry or invalid result, create the crop first, match the exact pixel dimensions, export a JPG, and compress with a small safety margin below the limit. When you need to create a compatible JPG, PNG, or WebP copy in your browser, try the conversion tool here before you submit your application.