Compress Image to 200KB: Step-by-Step Guide for Forms & Uploads
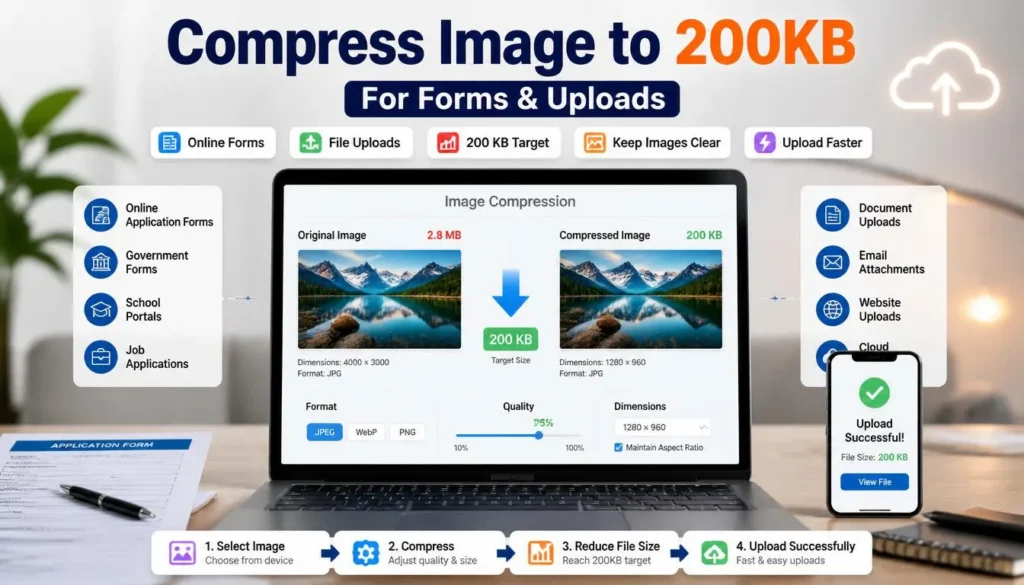
A form says “maximum file size: 200KB,” yet your photo is 2.8MB. You compress it once, the file passes the limit, and suddenly the text on a document or details in your face look soft.
That is the frustrating part. The goal is not simply to compress image to 200kb. You want a file that uploads successfully while still looking clean, recognizable, and professional.
The reliable approach is to resize first, choose the correct format for the upload portal, and then make small compression adjustments. You do not need desktop software for most everyday uploads.
When a 200KB Image Limit Matters
A 200KB limit is common for profile photos, job applications, university admissions, visa forms, marketplace listings, government portals, and support-ticket uploads. It is also a useful target for blog thumbnails and lightweight website images.
The image type changes the best approach.
A passport-style headshot can usually be reduced aggressively because the background is plain and the final display size is small. A scan of a certificate, ID card, or receipt needs more care because fine text and sharp edges reveal compression damage quickly.
Before editing, check three things on the upload page:
-
The maximum file size, which may be listed as 200KB, 200 kB, or 0.2MB
-
Accepted formats, such as JPG, JPEG, PNG, or WebP
-
Required image dimensions, aspect ratio, or photo background rules
Many people only notice the format requirement after creating the final compressed file. A 150KB WebP image may look great but still fail if the site accepts JPG only.
How to Compress Image to 200KB
1. Keep the original file untouched
Save your original photo or scan before doing anything else.
Compression often uses a lossy process, particularly with JPG and WebP. If you repeatedly compress the same already-compressed image, artifacts build up. Skin may develop blotchy patches, printed text can become muddy, and lines around a logo may look uneven.
Work from the source image every time you create a new version. If you need to test different settings, create separate exports rather than saving over the last one.
For example, retain passport-photo-original.jpg, then create files such as passport-photo-200kb.jpg and passport-photo-180kb.jpg.
2. Check whether the file really needs resizing
Image dimensions have a major effect on file size.
A photo from a recent iPhone or Android device can easily be 3,000–4,000 pixels wide. That is far more detail than a web form needs when it displays the result inside a small profile box.
For most uploads, these starting dimensions are practical:
Do not shrink an image below the portal’s minimum dimensions. If a form asks for a photo at least 600 × 600px, exporting a 400px file just to save a few kilobytes can trigger another rejection.
3. Pick JPG, WebP, or PNG deliberately
The smallest file is not always the correct upload file.
JPG is the safest choice for forms and uploads because it works almost everywhere. Use it for profile images, official forms, marketplace listings, and any portal that says JPEG or JPG is required. It works especially well with photographs.
WebP is often a strong choice for websites, WordPress images, product photos, and general web graphics. It can commonly produce a smaller result than a comparable JPEG while keeping similar visual quality. However, do not use it for a form unless the portal confirms WebP support.
PNG is useful for graphics with transparency, sharp logos, and certain screenshots. It is usually a poor choice for a full-color camera photo under a 200KB limit because photographic PNG files tend to remain much larger than JPG or WebP versions.
When the destination supports WebP, you can convert your images directly in the browser and compare the output with a JPG version before selecting the smaller clean-looking file.
4. Start with moderate compression
For a standard photo, begin with a quality setting around 80–85.
That range often preserves a natural-looking face, readable details, and smooth color transitions while reducing the size substantially. Some images will already land below 200KB after resizing alone. Others—especially photos containing foliage, crowds, patterned clothing, or detailed backgrounds—will need a lower setting.
Make changes gradually:
-
Resize the image to a sensible width.
-
Export at quality 85.
-
Check the file size.
-
If it is still too large, try 80.
-
Then try 75 only if necessary.
-
Inspect the image after each export.
Small quality reductions are easier to control. Dropping from 85 to 55 in one move may technically solve the upload problem, but it can create visible blotches and rough edges.
5. Inspect the final image at normal size
Do not judge the result only from a tiny thumbnail.
Open the compressed image and view it at roughly the size it will be used. For a profile photo, focus on the eyes, hairline, face edges, and clothing. For an ID scan or document, zoom enough to confirm that names, numbers, stamps, and fine print remain readable.
Look for these warning signs:
-
Blurry or smeared text
-
Blocky patches in a plain background
-
Harsh halos around a person or object
-
Grainy skin or distorted hair
-
Faded product labels
-
Color banding in skies, walls, or gradients
If the result looks damaged, do not keep reducing quality. Try reducing image dimensions by another 10–20 percent, then export again at a higher quality setting. In practice, a slightly smaller image at quality 82 often looks better than a large image at quality 55.
6. Leave a safety margin below 200KB
If the limit is strict, do not aim for exactly 200KB.
Targeting about 180–195KB gives you breathing room. Some systems calculate size differently, and a file that appears to be 200KB on your device may be treated as slightly over the limit by an upload form.
This is especially useful when a portal rejects the file without explaining why. A photo at 192KB is less likely to cause trouble than one sitting right on the limit.
Use our free WebP converter to create a browser-based compressed copy, then check both the file size and the image itself before you upload it.
Recommended Settings for Common Uploads
Passport, visa, and ID-style photos
Official uploads often have format, dimension, background, and size requirements. Follow those exact instructions before considering file size.
Use JPG unless WebP is specifically allowed. Keep the face sharp and avoid excessive smoothing or aggressive compression, which can create visible artifacts around the ears, hair, glasses, and clothing.
If the source image has a large plain background, you can often reach 200KB without pushing quality too low. Crop only if doing so does not violate the required framing.
Job application and profile images
For a headshot, 600–800px wide is usually enough for online forms. JPG at medium-to-high quality is a dependable option.
Avoid sending a screenshot of a photo if possible. Screenshots may include extra pixels, interface elements, and compression history that make the file harder to optimize. Export or use the actual original image instead.
Document scans and certificates
Document images need readable text, which makes them less forgiving.
Crop away desks, fingers, shadows, blank borders, and unrelated background before compressing. A tightly cropped certificate or ID card uses its file-size budget on the information the reviewer needs to see.
If a color scan is still over 200KB, use a clear JPG export and reduce the dimensions carefully. Do not shrink it until text becomes difficult to read. For a document containing only black text on a white page, grayscale may also reduce the file size while preserving readability.
E-commerce and website uploads
For a store listing or WordPress image, WebP is usually worth testing. It can often reduce file weight compared with JPEG at comparable visual quality, helping pages load with less image data.
If your platform allows it, convert the product image to WebP after resizing it to the largest display width you need. Always keep a JPG copy for marketplaces, email platforms, or older systems that may not accept WebP.
Common Mistakes When Compressing to 200KB
Compressing the image several times
This produces cumulative damage.
A photo that has been saved as a low-quality JPG, sent through a messaging app, screenshotted, and compressed again may look poor even if it is only 150KB. Start with the highest-quality original available.
Using the wrong format for the form
WebP is efficient, but form compatibility wins. If the site asks for JPG, upload JPG. If it requires PNG because the image includes transparency, use PNG.
Always read the accepted-file list before preparing the final version.
Reducing quality before reducing dimensions
This is where many attempts go wrong. If your image is 4,000px wide but the upload displays it at 500px, shrink the dimensions first.
Reducing unused pixels preserves more visible quality than trying to force a full-resolution photo into a 200KB budget.
Uploading an image that is exactly 200KB
A borderline file can fail even though it appears to meet the requirement. Leave a margin below the maximum.
This is a small precaution that saves time when you are submitting an application close to a deadline.
Forgetting to check readability
A file can meet the size rule and still be unusable. This matters most for IDs, certificates, receipts, and screenshots. Open the result before submitting it and make sure all critical content is still clear.
A Quick Example: 3MB Phone Photo to 200KB
Imagine you need to upload a professional headshot to a job portal that accepts JPG files up to 200KB.
Your original is 3MB and 3,024 × 4,032px.
-
Crop the image to the required portrait framing.
-
Resize it to around 700px wide.
-
Export it as JPG at quality 85.
-
Check its size.
-
If it is still above 200KB, reduce quality to 80.
-
If it remains too large, resize to 600px wide and export at quality 82.
-
Keep the version that is below 200KB and still looks natural at profile-photo size.
That process gives the file fewer pixels to store before compression begins. You preserve the important detail instead of making a huge image look overly compressed.
FAQ
Can I compress an image to exactly 200KB?
Yes, but aim slightly below the cap whenever possible. A file between roughly 180KB and 195KB is less likely to trigger a strict size-limit rejection.
Is WebP accepted for government forms and job portals?
Sometimes, but you should not assume it is. Many forms still request JPG, JPEG, or PNG only. Read the portal’s file requirements and use JPG when WebP is not explicitly accepted.
Why is my JPG still over 200KB?
The image may be too large in pixel dimensions, contain detailed textures, or use a high-quality setting. Resize it first, then lower quality gradually. Removing unused background through cropping can help too.
Will compressing a photo to 200KB make it blurry?
Not necessarily. A sensibly resized photo can often stay sharp at 200KB. Problems usually appear when someone tries to compress a full-resolution camera image without reducing its dimensions first.
Can I compress PNG images to 200KB?
Yes, although full-color photographs are usually easier to reduce as JPG or WebP. PNG is better suited to transparency, logos, and graphics with crisp edges. For photo uploads, a JPG export is often more practical.
Prepare Your Upload File
The best way to compress image to 200kb is to treat the target as a balance, not a race to the smallest file. Resize to the correct display dimensions, choose the format the upload portal accepts, and adjust compression in small steps while checking the result. When you need a lighter image for a website, product listing, or compatible upload form, try the conversion tool here to create a clean WebP, JPG, or PNG version in your browser.