Image Resolution Explained: DPI for Print vs Web
A photo may be labelled “72 DPI” and still look perfect on a website. The same image can look poor when printed as a brochure, even after someone changes its setting to 300 DPI.
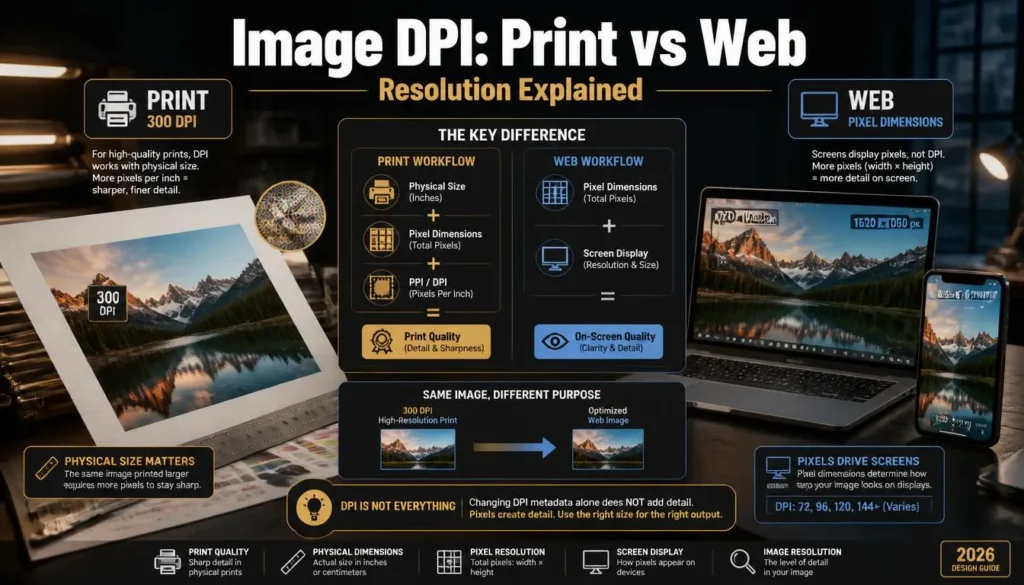
That confusion is common because image DPI for print vs web is really two different conversations. For print, resolution affects the physical size and sharpness of the finished piece. For the web, pixel dimensions matter far more than the DPI number stored in the file.
Once you understand the difference between pixels, PPI, and DPI, you can prepare images that stay sharp in print without uploading oversized files to your website.
DPI, PPI, and Pixels: The Useful Difference
These terms are often used interchangeably. They are related, but they do not mean the same thing.
Pixels are the tiny colored squares that make up a digital image. An image that measures 3,000 × 2,000px contains 6 million pixels. Pixel dimensions tell you how much image detail the file contains.
PPI, or pixels per inch, describes how closely those pixels are packed when an image is printed at a physical size. A 3,000px-wide image printed at 300 PPI is 10 inches wide. Print the same 3,000px image at 150 PPI and it becomes 20 inches wide, but with fewer pixels packed into each printed inch.
DPI, or dots per inch, technically refers to the dots of ink a printer places on paper. In everyday design work, people often say “300 DPI” when they mean “an image prepared at 300 PPI.” You will see both terms in print instructions, so it helps to understand the intended meaning rather than get stuck on the wording.
The practical rule is simple:
For example:
A 3,000 × 2,000px photo can print at 10 × 6.67 inches at 300 PPI. It does not become more detailed just because you change a metadata field from 72 to 300.
Image DPI for Print vs Web: The Key Differences
The important question is not “Should I use 72 DPI or 300 DPI?” It is “Where will this image be used, and how large will it appear?”
A website browser does not examine the 72 PPI or 300 PPI metadata to decide how large an image should appear. It renders the image according to its pixel dimensions and the page layout.
That means a 1,200 × 800px image will contain the same number of pixels online whether its metadata says 72 PPI, 96 PPI, or 300 PPI. Changing that number alone does not make the web image sharper, larger, or smaller.
Why 72 DPI Is Not a Web Quality Setting
The “72 DPI for web” rule is a leftover from older screen assumptions.
You may still see image editors export files marked as 72 PPI, while other software shows 96 PPI. Neither number is a modern web-quality target. Devices have different pixel densities, and websites use responsive layouts that scale images according to the browser, screen, and page CSS.
For web use, focus on these three things instead:
-
The image’s pixel width and height
-
The maximum width at which your site displays it
-
The file format and compression level
If your WordPress theme displays blog images at 1,200px wide, uploading a 4,000px-wide camera image rarely adds visible value. It adds file weight. Resize the image to around 1,200–1,600px wide, depending on how your theme uses featured images, then optimize the export.
To create web-ready versions without worrying about irrelevant DPI metadata, you can convert your images directly in the browser and choose a lighter WebP, JPG, or PNG format for the job.
How to Calculate the Right Resolution for Print
For print, start with the final physical size.
Multiply the print width and height in inches by the required PPI. Many print jobs use 300 PPI as a reliable benchmark for close-viewed photos, brochures, flyers, magazines, and product packaging. Large banners can often work at a lower PPI because they are viewed from farther away, but you should follow the printer’s specification.
Use this formula:
Here are useful examples:
Suppose you have a 2,400px-wide image and want to print it 12 inches wide. Divide 2,400 by 12:
That may look fine for some prints, particularly when viewed from a distance, but it is below the common 300 PPI target for close inspection. The image cannot gain real detail simply by setting its PPI value to 300. To print 12 inches wide at 300 PPI, you need 3,600 pixels across.
Changing DPI vs Resizing an Image
This is where many image edits go wrong.
Changing the PPI or DPI setting without resampling does not add or remove pixels. It changes the intended print size.
For example, imagine a 3,000 × 2,000px image:
The first two rows contain exactly the same pixel data. Only the print-size instruction changes.
Resampling is different. When you resample down, you remove pixels. That is useful when making a smaller website version. When you resample up, software invents extra pixels through interpolation or AI enlargement. This can make a file larger, but it does not recreate the original camera detail.
I have seen creators receive a printer’s request for “300 DPI,” change the metadata from 72 to 300, and assume the image is now print-ready. It may be print-ready if the original pixel dimensions are sufficient for the intended physical size. If they are not, the label alone will not solve the problem.
Choose the Right File for Each Use
Do not use one export for everything.
Keep a high-resolution master file for future print work. Then create separate copies for your website, social posts, email, marketplace listing, or client portal. This prevents you from accidentally replacing a print-ready original with a heavily compressed web version.
For print
Use the printer’s requested format and color requirements. JPG may be appropriate for photos; PDFs are common for print layouts; some printers request TIFF or specific PDF settings.
Check these details before delivery:
-
Final physical dimensions
-
Required bleed and safe areas for layouts
-
Required PPI or effective resolution
-
Color mode and profile requirements
-
File format and maximum file size
-
Whether the printer needs a flattened image or a print-ready PDF
Avoid WebP for traditional print submission unless the printer explicitly accepts it. WebP is designed primarily for web delivery, not as a standard print-production handoff format.
For websites
Create a dedicated web export.
Resize the image to the largest on-page width it needs, then use WebP or JPG for photographs. WebP is often a strong choice because it can produce a smaller file than comparable JPEG output while preserving similar visible quality. Use PNG when transparency or crisp graphic edges are essential.
For a typical blog image, this might mean a 1,200–1,600px-wide WebP export. For a small card image, 600–800px may be enough. A full-width hero image may need more, depending on the design.
You can use our free WebP converter to make separate web exports while keeping the original high-resolution image untouched for print.
Common Mistakes With Print and Web Resolution
Treating 72 DPI as low quality
A 72 PPI image is not automatically low quality.
Its print quality depends on the number of pixels available and the final physical print size. A 3,000px-wide image at 72 PPI may be assigned a very large print size, but it still has enough pixels to print sharply at 10 inches wide when set to 300 PPI without resampling.
For web viewing, its PPI metadata does not determine quality at all.
Assuming 300 DPI fixes a small image
Changing a 500 × 500px image from 72 PPI to 300 PPI does not add detail. At 300 PPI, it is simply intended to print at roughly 1.67 × 1.67 inches.
If you need it larger, begin with a higher-resolution original whenever possible.
Uploading a print master to WordPress
A 6,000px-wide print image is usually overkill for a blog post. It increases file size, can slow pages down, and gives visitors no useful extra detail if your content area is only 1,200px wide.
Make a separate optimized version for the site.
Using a web export for a large print
A 1,200px-wide web image may look excellent in an article but only supports a 4-inch-wide print at 300 PPI. Printing it much larger can make it appear soft or pixelated.
Keep the original master file. This is one of those habits that saves a lot of trouble later.
Confusing DPI with file size
Changing an image from 300 PPI to 72 PPI without resampling does not significantly reduce the file size because the pixel count remains unchanged.
To reduce web file size, resize the pixel dimensions, crop unused areas, choose the appropriate format, and apply controlled compression.
A Practical Example: One Photo, Two Exports
Imagine you take a 4,032 × 3,024px product photo.
You need it for two purposes:
-
A printed 8 × 10-inch catalog image
-
A 1,200px-wide product page image
For the catalog, the image can print at 8 × 10 inches at roughly 302 PPI. It has enough pixel data for a sharp close-viewed print. Keep a high-quality print file, following the printer’s preferred format and color requirements.
For the product page, make a separate 1,200px-wide export. Use WebP or JPG with moderate compression, then inspect product edges, labels, and texture at the actual page size. The web version will be significantly lighter, but visitors should see no meaningful loss in detail.
That is the practical answer to image DPI for print vs web: one master image, two intentional outputs.
FAQ
Is 72 DPI enough for web images?
The DPI or PPI metadata does not determine how sharp an image looks in a browser. For web images, use the correct pixel dimensions for the area where the image appears, then choose an efficient format and compression level.
Is 300 DPI always required for printing?
Around 300 PPI is a common target for sharp, close-viewed print materials. Large posters, banners, and signs may use a lower effective resolution because viewers stand farther away. Always follow the printer’s requirements for the particular product.
How can I tell if my image is large enough to print?
Divide the image’s pixel width and height by the intended print width and height in inches. If the result is around 300 PPI for a close-viewed print, the image is generally suitable. For example, a 3,000px-wide image prints 10 inches wide at 300 PPI.
Does changing DPI reduce an image file size?
Not by itself. If you change only the PPI or DPI metadata without resampling, the image keeps the same pixels and nearly the same file size. To reduce file size, reduce pixel dimensions, crop unused space, choose a suitable format, or compress the image.
Should I use WebP for print?
Usually no. WebP is optimized for web delivery. For printing, use the file format, dimensions, resolution, and color settings specified by your printer. Keep WebP for website images when your platform supports it.
Create the Right Export
Use the original high-resolution image as your master, then create separate files for print and web. For print, calculate the pixels needed from the final physical size and the printer’s required resolution. For the web, ignore the DPI label and focus on pixel dimensions, format, and file weight. When you are ready to prepare a smaller site-ready JPG, PNG, or WebP image, try the conversion tool here and keep your print master safely separate.