How to Convert HEIC to PNG for Free (Step-by-Step)
The photo files arrived from an iPhone, but the design brief called for PNGs.
That sounds like a small request until you are staring at a folder full of .HEIC files, a Canva-style layout waiting for image assets, and a client who wants to add labels, cutouts, and text overlays before the afternoon review. A JPG would have worked for basic sharing. In this case, PNG made more sense because the files were headed into a design workflow where sharp graphic detail mattered more than keeping file sizes low.
If you need HEIC to PNG conversion, you can do it for free in a browser without installing another phone app or desktop editor. The main thing is knowing when PNG is genuinely the right output format—and when it will only create a larger file for no practical benefit.
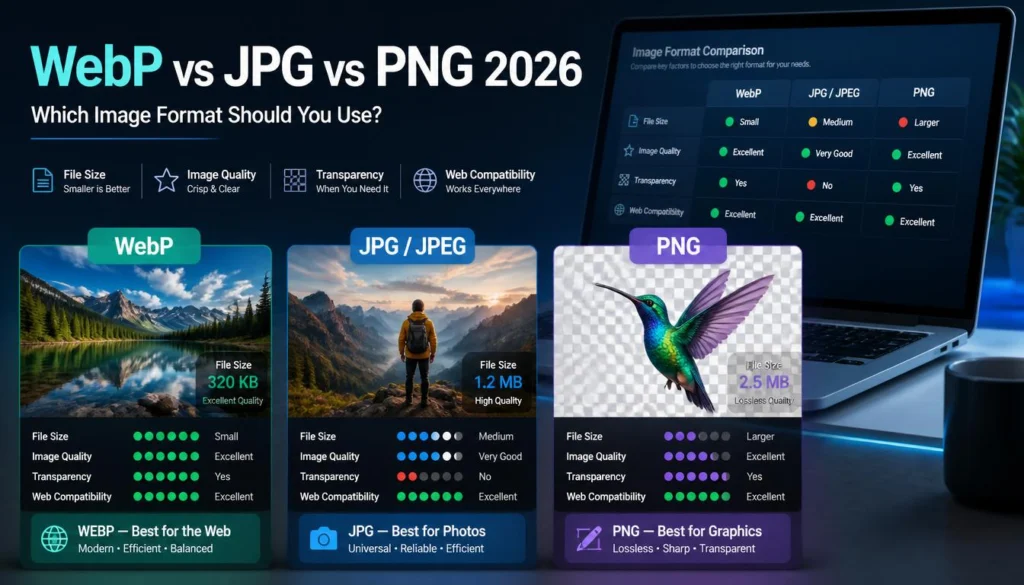
PNG uses lossless compression and can include an alpha channel for per-pixel transparency, which is why it remains useful for graphics, screenshots, and cut-out design assets. The W3C PNG specification describes PNG as a lossless raster format with optional alpha transparency.
When HEIC to PNG Makes Sense
HEIC is a strong original format for iPhone photography. It saves storage space efficiently and works well within Apple’s ecosystem. PNG has a different role.
PNG is usually the better choice when you need to preserve crisp edges, text, screenshots, line art, or graphic elements that may be edited again. It is not usually the best way to publish a large ordinary photo on a website.
Use PNG when you are converting an iPhone image for:
-
A presentation, document, or design mock-up
-
A screenshot with readable interface text
-
A social-media graphic that needs more editing
-
A product cutout after the background has been removed
-
A logo, icon, sticker, or illustration
-
A printed layout where you want to avoid repeated JPG recompression
-
A reference image that will be marked up with arrows, labels, or notes
For a full-size iPhone photo of a meal, a property interior, or a product on a plain background, PNG can produce a much larger file than JPG or WebP. It may look excellent, but the extra weight is often unnecessary.
That is the first decision to make: are you converting for editing and detail preservation, or for web delivery?
Before You Convert: Check the Source File
Not every image from an iPhone is HEIC.
Regular photos captured with the iPhone camera are often HEIC when High Efficiency is enabled. Screenshots are generally already PNG files. Images downloaded from messaging apps, websites, and social platforms may be JPG, PNG, WebP, or another format entirely.
Check the file extension before you begin:
-
.HEICmeans the photo needs conversion if you need a PNG copy. -
.PNGmeans it is already a PNG. -
.JPGor.JPEGmeans it is already a JPEG image. -
.WEBPmeans it is already in a web-focused format.
This takes seconds, and it avoids the common mistake of converting a screenshot to PNG when it was already a PNG from the start.
If you are working from an iPhone, open the photo in Files, share it to a computer, or use a browser-based converter that can access your selected photos. If you are already on a desktop, locate the original HEIC files before uploading anything.
How to Convert HEIC to PNG for Free
For a handful of images, browser conversion is normally the simplest route. You do not need a separate app just to make a PNG copy for a design project, client handoff, or document.
1. Select only the photos you need
Start with the final images needed for the task.
Suppose you are building a café menu graphic. You may need one coffee photo, two food images, and one image of the storefront. Convert those four files rather than exporting the entire camera roll.
This keeps your Downloads folder manageable and reduces the chance of mixing original photos with converted versions.
For larger projects, create a source folder and a separate output folder:
-
menu-photo-originals -
menu-photo-png
That small bit of organization is helpful when you later need to locate the clean HEIC original for a different crop or format.
2. Open a browser-based converter
Use a converter that supports HEIC uploads and PNG output.
For a quick design-ready export, you can make PNG copies from your iPhone HEIC images in the browser. Upload the files you selected, choose PNG as the output format, then download the converted versions.
The benefit of this approach is straightforward: no installation, no storage-hungry app, and no need to send your photos through several programs just to get a standard file format.
Keep the original HEIC files after conversion. PNG should be treated as a working copy or final delivery file, not as a replacement for your original camera image.
3. Choose PNG as the output format
Select PNG before starting the conversion.
PNG is lossless, meaning it does not use the same kind of quality-reducing compression associated with a standard JPG export. That can be useful when an image contains sharp lines, interface elements, visible text, or details that you plan to edit.
For example, imagine an iPhone photo of a storefront sign that will become part of a brochure layout. If you plan to crop it, add directions, place a logo over it, and export the final design later, working from a PNG can be a sensible choice.
A normal photograph does not gain magical new detail when converted from HEIC to PNG. The conversion preserves what is present in the source, but it cannot invent missing pixels, repair motion blur, or turn a low-light shot into a studio image.
4. Convert the file and download the PNG
Start the conversion and download the result.
Once downloaded, open the PNG and inspect it before sending it anywhere. Look for:
-
Correct orientation
-
Clear text and fine edges
-
No unexpected crop
-
No color shift that affects the design
-
A usable file size for its intended destination
Most HEIC photos will convert into a standard rectangular PNG with an opaque background. PNG supports transparency, but a conversion does not automatically remove a background from a regular iPhone photo.
That distinction catches people out all the time.
If your goal is a product image on a transparent background, you need a background-removal step first. After the background has been removed, PNG is often the right export format because it can preserve the transparent areas around the object.
5. Rename the final files clearly
Do not leave a client-facing folder full of names such as IMG_7821.png, IMG_7822.png, and IMG_7822-2.png.
Use descriptive filenames that explain what the file is:
-
coffee-shop-storefront.png -
iced-latte-menu-photo.png -
chocolate-croissant-close-up.png -
cafe-opening-hours-sign.png
If the PNG is intended for a graphic designer, add a version label only when it actually helps. Something like coffee-shop-storefront-cropped.png is useful. Something like final-new-revised-v6.png is not.
PNG Does Not Automatically Mean Transparent
One misconception needs clearing up early: PNG supports transparency, but it does not create transparency by itself.
If you convert a normal HEIC photo of a shoe on a white table to PNG, the white table is still part of the image. It will remain visible.
PNG becomes especially useful after you have removed or masked the background. The format can store varying levels of opacity, including soft edges around hair, fabric, glass, shadows, and curved products.
A practical product workflow might look like this:
-
Take the original photo on an iPhone in HEIC.
-
Convert the original to a workable format if your editing tool requires it.
-
Remove the background in an image editor.
-
Clean the edges at a high zoom level.
-
Export the finished cutout as PNG.
-
Place it over your website banner, ad creative, or social post.
For a plain photographic image with no cutout work, JPG or WebP usually makes more sense because the files will often be smaller.
HEIC to PNG vs JPG vs WebP
Choose based on the destination, not simply because one format sounds higher quality.
A PNG is a good working file for a graphic designer. A WebP is often a better website delivery file. A JPG is still practical when you are sending photos to a client, uploading to a legacy platform, or sharing a folder that must work everywhere.
If your end goal is a page on WordPress rather than an editable design asset, read the difference carefully before exporting. Converting a large photo to PNG and uploading it directly can make a page heavier than it needs to be.
Common Mistakes When Converting HEIC to PNG
Converting large camera photos to PNG for a website
PNG is not a default replacement for every web image.
A full-resolution photo from an iPhone can become very large as a PNG. If you are preparing a blog image, featured image, property gallery, or product photo for a website, WebP will usually be the more efficient final format.
Use PNG when the image needs lossless detail, transparency, or further design work. Use WebP when the goal is a fast-loading photographic page.
Expecting a transparent background after conversion
A format change does not remove image backgrounds.
If you need a transparent product cutout, edit the image first. Then save the result as PNG. Converting an untouched HEIC photo to PNG only changes the file format.
Deleting the original HEIC file
Keep the source image.
If you later need a wide website crop, a square social-media crop, a print-ready image, or a smaller WebP copy, the original HEIC gives you a cleaner starting point. Repeatedly converting from exported versions can make your workflow harder and may reduce quality if lossy formats become involved.
Using PNG for images that will be heavily compressed later
If a platform converts all uploads to JPG or WebP anyway, sending it a huge PNG may not provide a visible advantage.
Check what the destination platform does with uploaded images. You may be better off preparing the intended format yourself, especially for a website where you control the image pipeline.
Ignoring dimensions because PNG is lossless
Lossless does not mean the file should be huge.
A 4,000-pixel-wide PNG may preserve detail beautifully, but it is wasteful if it appears as a 500-pixel-wide card image. Resize based on the final display area before publishing or sharing.
When You Should Not Use PNG
There are plenty of cases where PNG is the wrong output choice.
Skip PNG when you are:
-
Uploading regular photographs to a website
-
Sending a large batch of casual photos by email
-
Preparing images for a product gallery with many items
-
Creating an image-heavy blog post
-
Working with a strict upload-size limit
-
Uploading a photo to a platform that automatically recompresses images
-
Sharing files over a slow connection
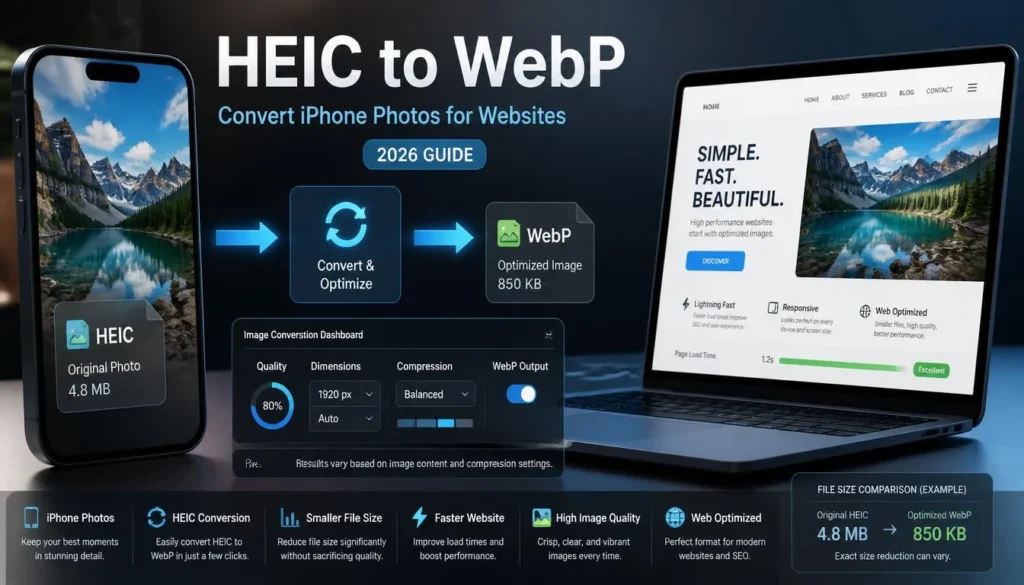
For a standard website photo, convert the HEIC original straight to WebP and resize it for the actual layout. This usually gives you a better balance between visual quality and page weight.
For broad compatibility outside web publishing, convert to JPG instead.
FAQ
Can I convert HEIC to PNG without installing an app?
Yes. You can convert HEIC images to PNG using a browser-based tool, then download the finished PNG files without installing a mobile or desktop application.
This is useful for occasional design work, client handoffs, document images, and small batches of iPhone photos.
Does converting HEIC to PNG improve image quality?
No. Conversion preserves the image data as well as the output process allows, but it cannot add detail that was not present in the original HEIC photo.
PNG is useful because it avoids lossy recompression and supports transparency. It does not sharpen a blurry image or recover detail from an overexposed photo.
Will converting HEIC to PNG remove the background?
No. Changing a HEIC file to PNG does not remove its background.
PNG can store transparent areas, but you must first remove the background with an editor or background-removal workflow. Then export the edited result as PNG.
Why is my converted PNG file so large?
PNG uses lossless compression, which is excellent for graphics and sharp details but often inefficient for full-color photographs. A high-resolution iPhone photo can become much larger as a PNG than as a JPG or WebP.
Resize the image to its intended dimensions, or choose WebP/JPG if transparency and lossless detail are not required.
Is PNG better than JPG for iPhone photos?
PNG can be better when you need a photo for editing, markup, graphics, or a transparent cutout. For ordinary photos, JPG is usually more practical because it produces smaller files and works almost everywhere.
For web publishing, WebP is often the stronger choice for photographic images.
Choose the Format for the Job
A clean HEIC-to-PNG conversion is easy. The more valuable part is choosing PNG for the right reason.
Use PNG when you need an editable, lossless image or a finished cutout with transparency. Keep your HEIC original as the source. For regular web photography, avoid turning every iPhone photo into a large PNG just because you can.
When a PNG is the file you actually need, a browser-based conversion is enough to get the job done quickly and keep your original images untouched.