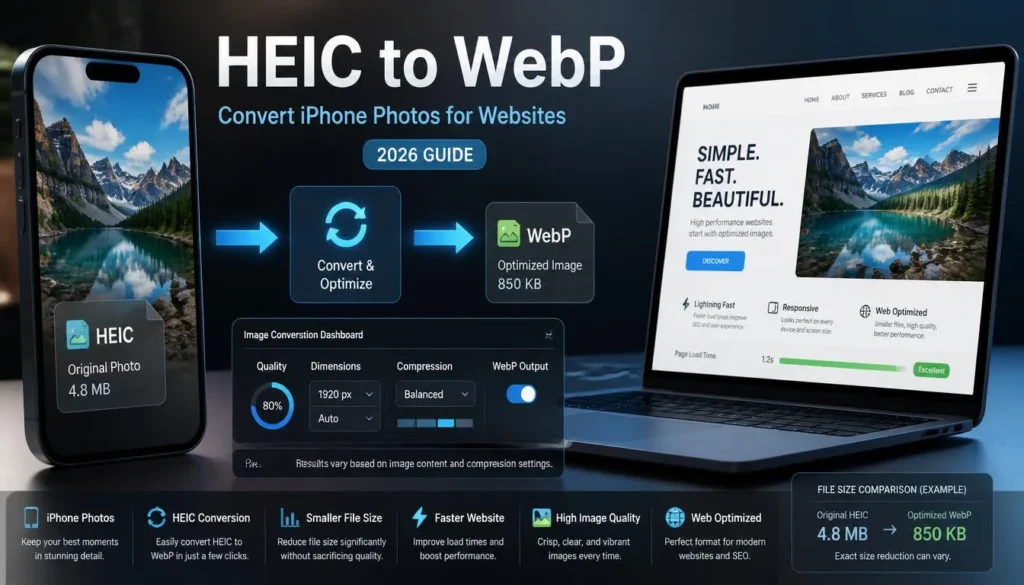
HEIC to WebP: Convert iPhone Photos for Faster Websites
The folder looked harmless at first: 67 photos of pasta dishes, cocktails, dining-room details, and a few moody kitchen shots taken on an iPhone. Great photos, too.
Then came the practical part. The restaurant wanted them on a WordPress site before the weekend, but the originals were HEIC files. Some would not preview in the desktop tools being used, and even after conversion to JPG, several were much larger than the actual spaces where they would appear.
That is where HEIC to WebP becomes a useful website workflow rather than just another file conversion task. You are not simply trying to make an iPhone photo open. You are preparing it for a browser, a smaller screen, a content management system, and a visitor who may be loading the page over mobile data.
WebP is designed for web images and supports both lossy and lossless compression, along with transparency where needed. It is supported by current versions of major browsers, including Chrome, Safari, Firefox, Edge, and Opera. Google’s WebP documentation
Why Convert iPhone HEIC Photos to WebP?
HEIC and WebP both aim to store images efficiently, but they solve different problems.
HEIC is useful inside the Apple ecosystem. Your iPhone can capture high-quality photos without filling storage as quickly as older formats. It works well for taking, keeping, and editing photos on supported Apple devices.
WebP is built for delivery on the web.
If you run a blog, online store, portfolio, restaurant site, property listing site, or client website, visitors do not need your original camera file. They need an image that looks good at the displayed size and does not make the page unnecessarily heavy.
A practical workflow often looks like this:
-
Take photos on an iPhone in HEIC.
-
Keep the HEIC file as the original source image.
-
Export or convert a copy to WebP for the website.
-
Resize that WebP image to match the page layout.
-
Upload the optimized version to WordPress or your CMS.
This keeps your original photo available for later edits while giving the website a file format that is more suitable for browser delivery.
HEIC vs WebP for Website Images
The distinction matters because an image format can be efficient without being ideal for every stage of a workflow.
A HEIC file may be perfectly fine on your iPhone, yet still cause friction when you try to upload it to WordPress, preview it in an older program, attach it to a client brief, or process it through a plugin. WebP is not automatically the best format for every situation, but it is usually a more practical final format for standard web photography.
How to Convert HEIC to WebP
You do not need an iPhone app or a desktop image editor for a basic conversion. A browser-based workflow is often enough, particularly when you are working from a laptop and need a clean batch of web-ready photos.
1. Decide which photos actually belong on the website
Do not convert an entire camera roll by default.
Start by selecting the photos you will use on a specific page. For example, a restaurant homepage might need:
-
One wide hero image
-
Three menu-category photos
-
Four gallery images
-
One image for the contact or reservations page
That is nine files, not 67.
This sounds obvious, but it is a common source of website clutter. I have seen WordPress media libraries full of unused camera originals, duplicates, resized copies, and “final-final-new” versions because the image selection happened after the upload instead of before it.
Choose the final candidates first. Keep the rest in your original photo archive.
2. Check the dimensions before conversion
An iPhone photo may be thousands of pixels wide. That can be useful for printing, cropping, or keeping a high-resolution master, but a website rarely needs every image at full camera size.
Think about where the image will appear.
A full-width desktop hero image needs more width than a small card in a three-column grid. A product thumbnail does not need the same dimensions as a banner image. Converting a massive original to WebP without resizing it can still leave you with a larger file than necessary.
As a starting point:
-
Use wider images for large hero sections and full-width banners.
-
Use moderate dimensions for blog content images and gallery photos.
-
Use smaller dimensions for product cards, testimonials, author images, and thumbnails.
-
Avoid uploading an original camera image just because it looks sharp on a large monitor.
The correct dimensions depend on your theme and layout, so inspect the rendered image size in your browser whenever possible. If a card displays an image at around 400 pixels wide, uploading a multi-thousand-pixel camera file is usually excessive.
3. Convert the HEIC image to WebP in your browser
Once you have selected and sized your images, convert them to WebP.
For a quick batch intended for a website, you can turn iPhone photos into WebP files for the web directly in your browser. Upload the HEIC files, choose WebP as the output, and download the converted copies.
The original HEIC files remain separate. That is how you want it.
Treat the WebP images as delivery assets. They are the versions you publish, not the only copies you keep. If you later need a different crop, a higher-quality export, or a social-media image, go back to the original rather than repeatedly converting and re-saving the same WebP file.
4. Choose a sensible quality level
There is no single perfect WebP quality setting.
A close-up product shot with text on packaging needs more careful inspection than a softly blurred background image. Food photography may show unpleasant artifacts in glossy highlights or fine garnish details if compression is pushed too far. A background photo behind a dark overlay can often tolerate more compression because much of the detail is not visible in the final design.
Use your eyes, not just the file size.
Open the exported WebP at the approximate size it will display on the page. Look closely at:
-
Text on labels, signs, menus, and packaging
-
Fine patterns in clothing or tablecloths
-
Hair, foliage, steam, and textured surfaces
-
Bright edges around plates, glasses, and products
-
Gradients in skies, walls, or studio backdrops
If the image looks clean at the display size, you do not need to chase a perfect pixel-level match with the original. Website visitors experience the page as a whole, not at 400% zoom.
On the other hand, do not assume that “WebP” means you can use an aggressively low quality setting. WebP can reduce file weight effectively, but a badly compressed photo still looks badly compressed.
5. Rename the WebP files clearly
Before uploading, replace camera filenames such as IMG_9452.webp with useful names.
For the restaurant example, better filenames might be:
-
seafood-pasta-restaurant.webp -
cocktail-bar-evening.webp -
italian-restaurant-dining-room.webp -
grilled-salmon-lemon-herbs.webp
Keep the names accurate. Do not cram every city name, dish variation, and keyword into a filename. A readable description is more useful for you, your clients, and anyone managing the site later.
This is also the point where you should make a simple image-to-page map if you are uploading a large batch. One note with filenames and intended placement can prevent accidental repeats or incorrect alt text.
6. Upload the WebP version to WordPress
Upload the converted file to your WordPress media library, then add it to the intended page, post, product, or block.
After uploading, check three things:
-
The image displays correctly on desktop and mobile.
-
The crop works inside the theme’s image container.
-
The file is not loading at an obviously oversized dimension.
Some themes crop featured images, product images, or gallery thumbnails automatically. If an important detail sits near an edge, such as a person’s face or a product label, preview it in the real layout rather than trusting the image editor alone.
A dish that looks perfect in the full photo can become an unappetizing close-up of a plate rim once a theme applies a square crop.
WebP Quality Checks Before Publishing
A proper HEIC-to-WebP workflow should take a few minutes, not hours. Still, skipping the final review is how good source photography becomes mediocre site imagery.
Check the image at its actual page size
Do not judge only from the image file opened full-screen.
A 2,500-pixel-wide photo may look flawless in an image viewer but appear soft, awkwardly cropped, or overly compressed when used as a 360-pixel card image. View the actual page in a browser and test it at common screen widths.
This is especially useful for:
-
WooCommerce category grids
-
Blog archive pages
-
Mobile homepage sections
-
Recipe cards
-
Portfolio thumbnails
-
Hotel, property, or restaurant galleries
Inspect the first visible screen
Images above the fold matter most because they are likely to be requested early in the page load. If the homepage opens with a large photo, optimize that image first rather than spending all your effort on gallery images further down the page.
A homepage hero image should be visually strong, correctly cropped, and reasonably efficient. It should not be the untouched 12-megapixel original from an iPhone.
Keep original assets outside the media library
A website media library is not a photo archive.
Store original HEIC files in a proper backup location: iCloud Photos, an external drive, a client folder, cloud storage, or a local project archive. Upload the final WebP copies to the website.
That separation makes future redesigns much easier. When the client asks for a square Instagram crop, a wide banner crop, and a smaller mobile variant six months later, you will still have the original image to work from.
Common Mistakes With HEIC-to-WebP Conversion
Converting without resizing first
Format conversion alone does not fix an oversized image.
A huge WebP can still be unnecessarily heavy if the dimensions far exceed the display area. Resize based on the actual layout, then use WebP compression to make the file more efficient.
Re-exporting from an already compressed file
Avoid this chain:
HEIC → JPG → lower-quality JPG → WebP
Each lossy export can remove image detail. Convert directly from the original HEIC photo whenever possible. If you need multiple variants, create them from the original source rather than from an older compressed copy.
Treating every WebP image the same
A gallery photo, a transparent logo, a product image with tiny text, and a decorative background should not all receive the same conversion treatment.
Photographs usually work well with lossy WebP. Graphics and logos may need lossless WebP or PNG, depending on the design requirements. A transparent image needs a format and conversion setting that preserves its alpha channel.
Forgetting that WordPress may generate extra sizes
WordPress and themes often create thumbnail, medium, large, and custom image sizes after upload. That is helpful, but it does not excuse uploading enormous source files.
Start with a sensibly sized WebP image. Then let WordPress generate smaller variants where appropriate.
Replacing images without checking caches
If you replace an image on a live site and still see the old version, the culprit may be browser cache, a WordPress caching plugin, a CDN, or image optimization caching.
Clear the relevant cache before assuming the new WebP file failed to upload. This catches people out constantly during client handovers.
Should You Use WebP for Every iPhone Photo?
Not necessarily.
Use WebP when the photo is going onto a website and you want a broadly supported, efficient image format. It is a strong default for blog photographs, e-commerce imagery, portfolio work, property listings, restaurant galleries, and editorial visuals.
Keep HEIC when you are storing original iPhone captures, editing in a compatible Apple workflow, or preserving source files for future exports.
Use JPG when a specific platform, client workflow, or legacy tool requires it. JPG remains widely compatible, even though WebP is often the more useful web delivery format.
Use PNG or lossless WebP for screenshots, interface graphics, diagrams, and assets that need transparency. A regular photograph of a product or a meal rarely needs PNG.
Read also: How to Convert HEIC to JPG Free on iPhone
FAQ
Is WebP better than HEIC for websites?
For most websites, yes. HEIC is effective for capturing and storing iPhone photos, but WebP is a more reliable format for browser delivery and common web publishing workflows.
Use HEIC as the original file and WebP as the website-ready copy.
Does converting HEIC to WebP reduce image quality?
WebP can be exported with lossy or lossless compression. A lossy WebP export may discard some information, but at sensible quality settings it can still look excellent at normal website display sizes.
The key is to inspect the final image where it will appear. Do not judge only by the smallest possible file size.
Can WordPress upload HEIC files directly?
HEIC support varies by hosting environment, WordPress setup, server image libraries, plugins, and browser workflow. Even when an upload works, you may still run into compatibility issues with optimization tools or visitors’ devices.
Converting to WebP before upload is often the more predictable route for website photos.
Should I convert HEIC to JPG or WebP?
Choose JPG if you need the widest possible compatibility outside the web, such as email attachments, older software, client documents, or third-party upload portals.
Choose WebP when the image is specifically for your website and you want a format designed for efficient browser delivery.
Can WebP images have transparent backgrounds?
Yes. WebP supports transparency in both lossless and lossy modes. That makes it useful for certain logos, product cutouts, and interface graphics, although you should always test the file in your actual theme and design setup.
Build a Better Publishing Workflow
The fastest web-image workflow is not “upload whatever came off the phone.” It is a short, repeatable handoff process:
-
Keep the original HEIC photo safely archived.
-
Select only the photos that belong on the page.
-
Resize them for their intended layout.
-
Convert the selected images directly to WebP.
-
Inspect quality, cropping, and mobile display.
-
Upload descriptive, web-ready files to your CMS.
Once you get used to this process, HEIC stops being a nuisance. It becomes the source format, while WebP becomes the lightweight version your visitors actually see.