5 Real Ways to Reduce Image Size Without Losing Quality
Large images make websites slower, fill storage space, and trigger file-size errors on upload forms. The usual reaction is to drag a compression slider down until the file looks small enough. That works sometimes. It also creates blurry photos, fuzzy screenshots, and product images that no longer look trustworthy.
To reduce image size without losing quality, focus first on data the viewer will never notice: unnecessary pixels, empty space, unsuitable formats, and metadata. Compression should be the final adjustment, not the first move.
These are the five methods I use when preparing images for WordPress posts, e-commerce pages, client uploads, and everyday online forms.
What “Without Losing Quality” Really Means
There are two versions of image quality.
The first is technical perfection: every pixel remains identical to the original file. That is possible with lossless compression and metadata cleanup, but the savings may be modest.
The second is visual quality: the image looks unchanged at the size people actually view it. This is usually the more useful goal for web images. A 4,000px photo converted into a sharp 1,200px WebP file is not identical at the pixel level, but it can look just as good in a blog post or product gallery.
That distinction matters. If you are creating a print asset, preserve the original. If you are preparing an image for a 600px-wide website card, optimize for the card—not for a full-screen zoom test.
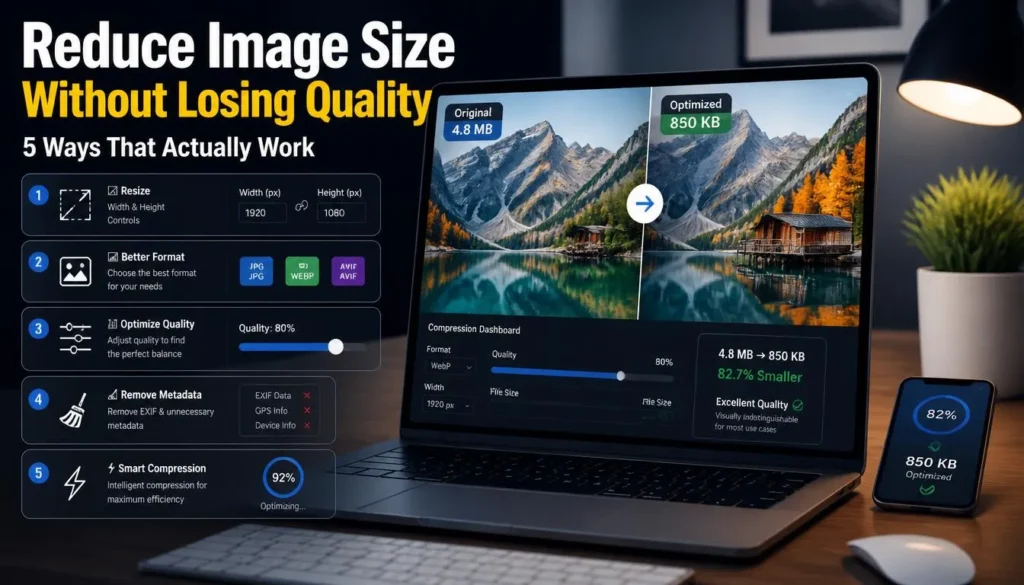
1. Resize to the Real Display Dimensions
The fastest way to shrink an image is to remove pixels it does not need.
A phone photo may be 4,032px wide. If your WordPress theme displays the image at 1,200px wide, the extra pixels are not improving what a visitor sees. They are only increasing file size and download time.
Resize the image before applying strong compression.
Keep the aspect ratio locked while resizing. A 4:3 landscape image should remain 4:3 unless you intentionally crop it. Stretching it into a different shape will not make it look sharper; it will only distort the image.
For a quick web export, you can convert your images directly in the browser after resizing to the width your page actually uses.
2. Crop Away Pixels That Do Not Matter
Cropping often saves more than people expect.
Think about a product photo with a small item in the center and a large white background around it. Or a document scan that includes your desk, a shadow, and several inches of blank paper. Those empty or irrelevant areas still contain pixels, and pixels affect file size.
Crop intentionally:
-
Remove unused background around products and portraits
-
Trim browser tabs, desktop space, and toolbars from screenshots
-
Remove blank margins from scans and signatures
-
Tighten the frame around the subject, while respecting form requirements
-
Create a dedicated crop for the space where the image will appear
A good crop can also improve the image itself. A product becomes easier to examine. A tutorial screenshot gets straight to the relevant button. A profile photo looks more professional without changing its quality settings at all.
Do not over-crop an official image, though. Passport, visa, school, and job-application forms may specify head position, background, or dimensions. Follow those rules before optimizing the file.
3. Use the Right Image Format
Format choice has a major effect on file size.
A photograph saved as PNG can be many times larger than it needs to be. A logo with transparency can lose its clean edges if you force it into JPG. The right format preserves the kind of detail that matters while avoiding unnecessary file weight.
WebP supports both lossy and lossless compression. For photographs, a lossy WebP export often creates a noticeably lighter file at similar viewing quality. For logos, icons, and transparent graphics, lossless or near-lossless WebP can keep edges clean while reducing size compared with a bulky PNG.
If you publish images online, our free WebP converter makes it easy to compare WebP, JPG, and PNG versions from the same source image. The smallest file is not automatically the winner; choose the version that is clean at its intended display size.
4. Remove Metadata and Hidden Extras
Photos can carry data that has nothing to do with how they look.
Camera files may include location data, camera model details, timestamps, editing information, embedded color profiles, thumbnails, and other metadata. This is useful in some photography workflows, but it rarely helps a blog visitor or online-form reviewer.
Removing unnecessary metadata can reduce file size without changing visible pixels. It may also be a privacy improvement when you are sharing photos taken on a phone.
This technique works best as part of a larger workflow. Metadata removal alone will not turn a 6MB camera photo into a 200KB web image. But when you have already resized and chosen the right format, it is a simple way to avoid carrying extra data into the final export.
Keep a master original with its metadata if you need it. Export a separate optimized version for publishing or uploading.
5. Apply Moderate, Purposeful Compression
Compression is useful. The mistake is using too much of it too early.
For ordinary photos, start around a quality setting of 80–85. Then inspect the exported image. If the file is still larger than you need, reduce quality slightly or reduce the dimensions a little more.
Images react differently:
-
A studio portrait against a plain wall compresses easily
-
A photo of trees, grass, detailed fabric, or a crowd needs more data
-
Screenshots need high detail around text, icons, and straight lines
-
Product labels and packaging should remain readable
-
Smooth skies and gradients can show banding when compressed too hard
For website images, a typical workflow is to resize first, then export as WebP at a moderate quality. WebP files are often smaller than comparable JPEGs while maintaining similar visual quality, which makes it a practical default for many web photos.
When you need to reduce image size without losing quality in a screenshot or graphic, do not rely on a low JPG setting. Try high-quality WebP or PNG instead, then compare text and edges at normal display size.
A Practical Workflow for Web Images
Here is a repeatable process for a typical blog featured image.
-
Keep the original photo in a separate folder.
-
Crop it to the composition you want for the article.
-
Resize it to 1,200–1,600px wide.
-
Export a WebP version around quality 80–85.
-
Inspect the result at the approximate size used by your theme.
-
Check the file size and make one small adjustment if necessary.
-
Upload the final optimized file, not the original camera image.
For example, a 5MB, 4,000px-wide photo can often become a sharp web-ready image after a 1,400px resize and a moderate WebP export. The exact result depends on the image content, but the visible quality at article width can remain excellent.
Common Mistakes That Cause Quality Loss
Compressing before resizing
This is the big one.
If you use heavy compression on a huge image, the encoder has to discard visible detail across millions of pixels. Resize first. You will usually need less aggressive compression afterward.
Saving the same JPG repeatedly
Every lossy save can add artifacts. A photo downloaded from social media, edited as a JPG, sent through a messaging app, and compressed again may already have lost a lot of detail.
Always create optimized copies from the highest-quality source you have.
Choosing PNG for a large photo
PNG is excellent for transparency and graphic edges. It is rarely the efficient choice for a full-color photo.
If a photo seems oddly large, check whether it is a PNG. Converting it to JPG or WebP is often the fastest fix.
Using very low quality settings by default
A quality setting of 40 may work for a tiny background thumbnail, but it is not a universal shortcut. It can destroy subtle gradients, skin texture, lettering, and product details.
Begin higher and make small adjustments. You will get a more predictable result.
Ignoring the final display size
An image may look soft at 200% zoom yet appear completely sharp in a 400px card. Conversely, an image that seems fine in a tiny preview may look poor as a full-width hero image.
Judge the optimized file where it will actually be seen.
- Read also : Compress Image to 200KB for Forms and Uploads
FAQ
Can you reduce image size without losing quality completely?
Yes, when you use lossless techniques such as metadata removal, efficient encoding, and careful format changes for compatible images. For large reductions, you will usually resize or use lossy compression, but you can often keep the visible difference negligible at the image’s intended display size.
What is the fastest way to make an image file smaller?
Resize it to the dimensions you genuinely need. A high-resolution camera photo is commonly much larger than a website, form, or social platform requires. After resizing, use the appropriate format and moderate compression.
Is WebP better than JPG for smaller images?
For many website photos, WebP is often smaller than JPG at similar visual quality. JPG remains the better choice when an upload platform requires it or when maximum compatibility is the priority.
Why does my PNG image stay so large?
PNG preserves image data losslessly and is designed for graphics, transparency, and sharp edges. A full-color photograph contains a huge amount of visual information, so PNG is often much larger than a comparable JPG or WebP file.
Does changing DPI reduce image file size?
Usually, no. For online images, pixel dimensions, format, compression settings, and metadata have the largest effect on file size. Changing DPI alone rarely solves a file-size problem.
Make Smaller Images That Still Look Right
The best way to reduce image size without losing quality is not one setting or a magic percentage. Resize to the real display dimensions, crop dead space, use WebP or JPG for photographs, preserve PNG for the graphics that need it, and compress with restraint. For a quick browser-based export of a photo, screenshot, or product image, try the conversion tool here and compare the final file at its real on-page size.